-

- About Us
-
Children &
Youth -
Afterschool
Main Site After School Kochavim After School Academy Avenue W After School SONYC at Ave W SONYC at I.S. 206 After School at Brooklyn Rise Mini Camps SONYC @ Mainsite. After School at P.S. 52 COMPASS After School at PS. 091 COMPASS After School at I.S. 170 COMPASS Free Compass After School at P.S. 170 Free Compass After School at P.S. 329
-
Summer
Camps -
Sports &
Swim - Membership
- Adults
-
JCC Brooklyn
Sites

Kings Bay Y
How To Register for a Program in Community End
REGISTERING FOR A PROGRAM IN COMMUNITY END (CUSTOMER END)
● Registrations are timed. Please be mindful of how long you are spending on a registration or it will time out and make you restart.
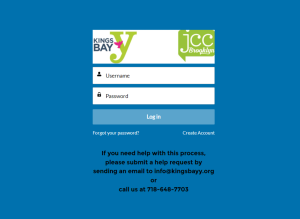
Step 1: Create an account or log into your existing account
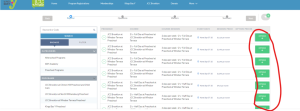
Step 2: Click either the “Program Registrations” tab at the top of the page or the “Browse Registrations” tab located on the right side.
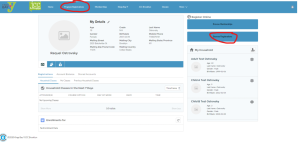
This will bring you to the registrations page where you select from the categories that you need.
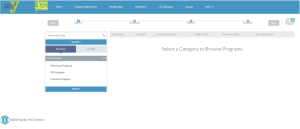
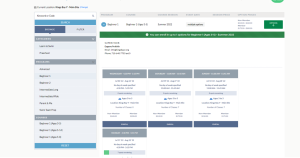
Step 3: Click on the option that you need (i.e. if you want Learn to Swim, select Learn to Swim).

Once you click on the selection you need, you will see all the options available.

– Select the class you are interested in.
– For programs that have multiple options, you can filter the options to get a targeted list (i.e. Selecting Beginner 1 will show you all the available class dates for that specific level
and age group).
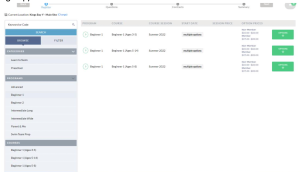
Step 3 – Select the Learn to Swim option you want by clicking on “OPTIONS.”
Once you click “OPTIONS,” the drop-down menu will let you select the days you need.
Select the days you want by clicking “enroll.” (This is available once registration opens.)
Once you click on the day you want, you will see a pop-up to select the person you want to enroll in this program.
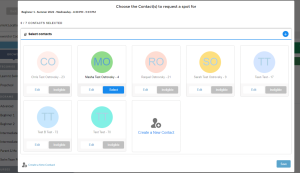
– If the site does not let you select a person, click on “Ineligible” and you will see why you cannot register them for that particular class.
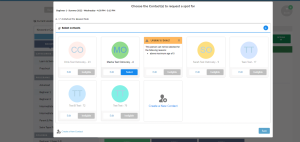
– You can also edit that person’s information (i.e. if the birthday you first entered was entered incorrectly) by clicking “Edit” under their name.
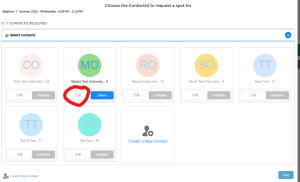
Once you select the individual you want to register, click “Save” at the bottom right corner.
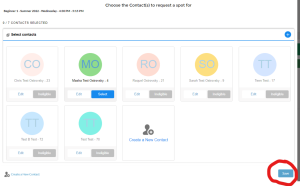
Once you select what you want to register for, click “NEXT” at the top right.
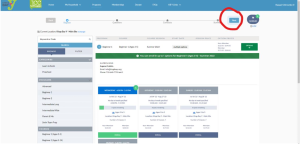
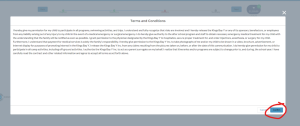
This will bring you to the “contract” portion where you will need to e-sign the contracts.
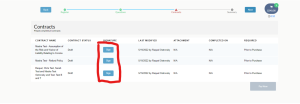
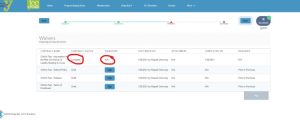
To e-sign the contract, click “Sign” and the contract will open for you to read and sign. You will need to click “Confirm” at the bottom right to officially sign the contract.
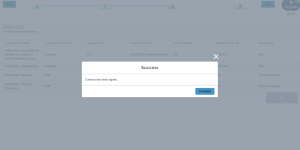
Once the contract is signed, you will see “Complete” under contract status and N/A under signature.
A confirmation will then pop up. You can click either “Complete” or the “X” at the right-hand corner to close it out.
After all contracts are completed, click “Next” at the top right.
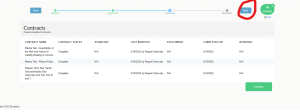
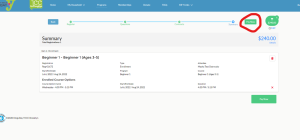
After all contracts are signed, click “Next” again and it will bring you to the summary page.
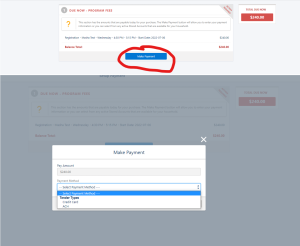
To check out, click on “Pay Now.”
You will need to click “Make Payment,” which will allow you to choose a payment option and to enter it.
– Credit cards incur a processing fee (uses your card #).
– ACH does not incur a fee (uses your bank account # and routing #)
After you make the payment, you’re all set! You will able to view the registration(s) on the home page of your account.
All payments are calculated automatically.